Best Gear
Best Wort Chillers
The Coldbreak 50 Foot Immersion Wort Chiller at $149.99 is the best wort chiller for most 5 to 10 gallon home brew batches, since the extra coil length over a 25 foot chiller cools wort noticeably faster for roughly $50 more.
Brewers chasing a faster cool down can step up to a counterflow plate chiller like the Ferroday 60 Plate Wort Chiller at $62.95, as long as they flush it immediately after every brew to avoid clogging.
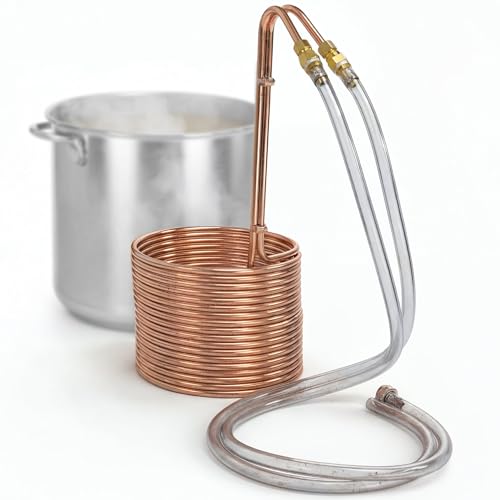
Coldbreak 50 Foot Immersion Wort Chiller
Coldbreak
50 feet of coil at $149.99 cools a 5 to 10 gallon batch of wort meaningfully faster than a shorter coil, while still being as simple to use as any immersion chiller: submerge it and run water through.
Price last checked at publication and changes often.
Why cooling wort quickly matters
Wort needs to drop from boiling down to a temperature yeast can be safely pitched at before fermentation starts, and doing that quickly matters for two reasons. A fast cool down reduces the window where airborne bacteria could contaminate the wort, and it also helps produce a stronger cold break, which is the protein and hop material that clumps and drops out of solution as wort chills, leaving clearer beer behind.
There are two chiller designs in this catalog: immersion chillers, which are a coil of tubing you submerge directly in the hot wort while cold water runs through the coil, and counterflow or plate chillers, which run hot wort and cold water on opposite sides of a thin barrier so heat transfers without the wort and cooling water ever touching the same surface as the kettle.
Immersion chillers are simple: drop the coil in, connect a garden hose, and stir occasionally while it runs. Plate and counterflow chillers cool faster because of the larger surface area packed into a small unit, but wort passes through narrow channels, which means hop material and protein trub can clog them if the chiller isn't flushed clean immediately after use.
How we chose
The coil length, plate count and price below come from the manufacturer specifications published on each chiller's listing, along with patterns from verified purchase owner reviews, including reports about ease of cleaning and clogging on the plate chillers. This roundup was not built from a side by side cooling speed test run by this team; it reflects the published specifications and what verified owners report after using these chillers themselves.
How the chillers compare
Coil length and plate count are the closest thing to a direct comparison point across designs, since both roughly track how much surface area is available to transfer heat.
| Chiller | Type | Size | Price |
|---|---|---|---|
| Coldbreak 25 Foot Immersion Wort Chiller | Immersion | 25 ft | $99.99 |
| Coldbreak 50 Foot Immersion Wort Chiller | Immersion | 50 ft | $149.99 |
| Coldbreak 60 Foot XL Wort Chiller (9 to 12 gal) | Immersion | 60 ft | $184.12 |
| Ferroday 20 Plate Wort Chiller | Plate, counterflow | 20 plates | $43.90 |
| Ferroday 60 Plate Wort Chiller | Plate, counterflow | 60 plates | $62.95 |
Matching a chiller to your batch size and your patience
The Coldbreak 25 Foot Immersion Wort Chiller at $99.99 is a reasonable starting point for a standard 5 gallon batch. The shorter coil costs less but takes longer to bring wort down to pitching temperature than a longer coil would, which mostly matters if you are trying to minimize the time your wort sits exposed before fermentation starts.
Stepping up to the Coldbreak 50 Foot Immersion Wort Chiller at $149.99 buys meaningfully faster cooling for about $50 more, without changing anything about how the chiller is used: it is still a coil you submerge and run water through. This is the reasonable middle ground for most home brewers, especially anyone regularly brewing 5 to 10 gallon batches.
The Ferroday 60 Plate Wort Chiller at $62.95 takes a different approach entirely. A counterflow plate design like this cools wort dramatically faster than an immersion coil because of how much surface area is packed into the unit, but it comes with a real maintenance requirement: it must be flushed clean with hot water, and ideally a cleaner like PBW, immediately after every brew. Hop material and protein trub that dry inside the narrow plate channels are difficult to fully remove later and can permanently reduce flow or clog the unit. Brewers who don't clean their gear immediately after brewing, or who regularly brew heavily hopped, hazy styles without a hop spider or other way to keep particulate out of the kettle, should not buy a plate chiller. An immersion coil handles that particulate load without clogging.
A gap worth knowing about
This catalog does not include a true glycol chiller, the kind of active refrigeration system some more advanced home brewers use to chill wort below tap water temperature or to control fermentation temperature directly. Every option here relies on tap water temperature as its cooling limit, which is worth knowing if your tap water runs warm in hot weather, since none of these chillers can cool wort colder than the water running through them.
Getting an accurate reading once wort is chilled
A hydrometer or refractometer reading taken right after chilling can be thrown off by residual heat in the wort, since these instruments are calibrated at a specific reference temperature. Our hydrometer correction calculator adjusts a reading taken at a different temperature back to what it would read at the calibration temperature, which matters more the faster you take a gravity reading after chilling, since the wort may not yet be fully at a uniform temperature throughout the kettle.
Setting up a chiller for a faster cool down
An immersion chiller cools faster with more agitation, since moving wort past the coil constantly exposes fresh, still hot liquid to the cold metal instead of letting a layer of already cooled wort sit against it. Gently stirring the kettle every few minutes while the chiller runs speeds up the process meaningfully compared to leaving it untouched.
Water flow rate through the coil matters as much as coil length. A garden hose running at low pressure moves less cold water past the coil per minute, which slows the whole process regardless of how many feet of tubing you're using. If your cool down times feel slower than the coil length suggests they should be, check your water pressure before assuming the chiller itself is underperforming.
Some home brewers run their immersion chiller's outflow into a bucket or basin and recirculate that water with a small pump and a bag of ice, rather than running fresh tap water continuously, which uses far less water overall and can cool wort below tap water's own temperature. This setup takes more equipment than plugging a chiller straight into a hose, but it's a reasonable next step if water usage or a slow tap water temperature is holding back your cool down times.
Immersion chillers are generally built from either copper or stainless steel tubing. Copper conducts heat somewhat faster, which can mean a slightly quicker cool down, while stainless tends to resist the pitting that copper can develop over years of exposure to cleaners and sanitizers. Check the specific material listed on whichever chiller you're considering, since it isn't always called out the same way across every listing.
Whichever chiller you land on, sanitizing the outside surface that touches your wort matters, even though the wort itself is at or near boiling temperature when an immersion coil first goes in. Dunking the coil into a sanitizer solution briefly before lowering it into the kettle, or simply lowering it in during the last few minutes of the boil so residual heat covers it, are both reasonable ways to handle this before your cool down begins.
Coiling and uncoiling an immersion chiller repeatedly over years of use can eventually stress the tubing at the bend points, so inspect the coil occasionally for any kinking or thinning, especially near where it connects to the hose fittings. A plate chiller has no coil to stress in the same way, but its fittings and gaskets are worth the same periodic check for wear.
The three tiers
These are three genuinely different builds, not the same product at three prices. Buy the tier that matches how much you already know you will use it.
Coldbreak 25 Foot Immersion Wort Chiller
Coldbreak
A shorter 25 foot coil costs less at $99.99 and cools a 5 gallon batch adequately, just more slowly than a longer coil would.
$99.99
View on AmazonColdbreak 50 Foot Immersion Wort Chiller
Coldbreak
50 feet of coil for $149.99 cools noticeably faster than the 25 foot version, while staying just as simple to use.
$149.99
View on AmazonFerroday 60 Plate Wort Chiller
Ferroday
A 60 plate counterflow design at $62.95 chills wort dramatically faster than any immersion coil, but must be flushed clean immediately after every use or it can clog. Brewers who don't clean gear right away, or who brew hazy, heavily hopped styles without straining particulate out first, should not buy this.
$62.95
View on AmazonEverything else worth considering
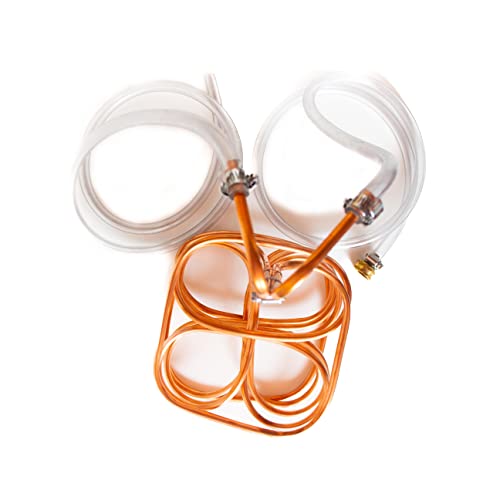
Craft A Brew Clover Immersion Chiller
Copper immersion coil supplied with two vinyl hoses, a complete first chiller.

Coldbreak 60 Foot XL Wort Chiller (9 to 12 gal)
Three eighths inch by sixty foot pure copper coil built for nine to twelve gallon batches.

Northern Brewer Copperhead Immersion Wort Chiller
Copper immersion coil that drops into the kettle at flameout to bring wort down to pitching temperature.

Ferroday 20 Plate Wort Chiller
Compact brazed plate exchanger, the cheapest way into counterflow chilling.
Related on BrewGearCalc
- Boil-off calculator
- Hydrometer correction calculator
- Best brew kettles
- Best all-grain brewing systems
- Brewing reference
Frequently asked questions
- Is an immersion chiller or a plate chiller better for a beginner?
- An immersion chiller is the better starting point. You submerge the coil in the kettle and run water through it, with no risk of clogging from hop material or trub. A plate or counterflow chiller cools faster but has narrow internal channels that need to be flushed clean immediately after every brew, and a beginner who forgets that step risks clogging or damaging the unit.
- Why does coil length matter on an immersion chiller?
- A longer coil has more surface area in contact with the wort at once, which transfers heat faster and brings the wort down to pitching temperature sooner. A 25 foot coil works for a standard 5 gallon batch but takes longer than a 50 or 60 foot coil would. The trade-off is mostly price and the physical size of the coil you need to fit inside your kettle.
- Can I chill wort with just an ice bath instead of a chiller?
- Yes, some home brewers set the kettle in a sink or tub of ice water instead of buying a dedicated chiller, though it generally takes longer than either an immersion or plate chiller and uses a lot of ice. A dedicated chiller is faster and more consistent, but an ice bath is a reasonable way to brew your first few batches before deciding a chiller is worth buying.
- How do I clean a plate wort chiller so it doesn't clog?
- Flush it with hot water immediately after use, before any hop material or protein trub has a chance to dry inside the narrow plate channels. A cleaner like PBW run through the chiller right after brewing, followed by a thorough hot water rinse, is a common way home brewers keep a plate chiller flowing freely. Waiting until the next brew day to clean it is the most common reason these chillers clog.
- Can a wort chiller cool wort colder than my tap water?
- No, not with any of the chillers in this catalog. Both immersion and plate wort chillers rely on the temperature of the water running through them, so the coldest they can bring wort down to is roughly your tap water's temperature. A dedicated glycol chiller can cool below tap water temperature, but that is a different, more involved category of equipment not covered here.
- Do I need to sanitize my wort chiller before use?
- The wort is still at or near boiling temperature when an immersion chiller goes in, which handles sanitization on contact, so a clean chiller is generally sufficient rather than a separately sanitized one. A plate chiller sees wort after it has left the boiling kettle in some setups, so keeping it clean and flushed between uses matters just as much as it does for preventing clogs.
Researched from published brewing formulas, manufacturer specifications and verified owner reviews. This is general guidance, not professional advice.